In the first part, we learned how to set up a cordova project. In this tutorial, we will learn to develop a Hybrid Android Mobile App from scratch, using Framework7.
We would be using the material theme of Framework7, supported for Android. Before we start, download the Kitchen Sink Material App from Github. Go through the files to get more clarity.
To start off, lets edit the content of index.html file. The reason for doing this is because Framework 7 provides two different templates; one for iOS and one for Android; since the default is iOS so we have to change the index.html file to Android theme. To do that, go to Apps Layout section and copy the code written under Basic Android/Material App Layout and paste it in the index.html file, while ensuring the previously written code is deleted entirely. The index.html should now look like this:
1 2 3 4 5 6 7 8 9 10 11 12 13 14 15 16 17 18 19 20 21 22 23 24 25 26 27 28 29 30 31 32 33 34 35 36 37 38 39 40 41 42 43 44 45 46 47 48 49 50 51 52 53 54 55 56 57 | <!DOCTYPE html> <html> <head> <!-- Required meta tags--> <meta charset="utf-8"> <meta name="viewport" content="width=device-width, initial-scale=1, maximum-scale=1, minimum-scale=1, user-scalable=no, minimal-ui"> <meta name="apple-mobile-web-app-capable" content="yes"> <!-- Color theme for statusbar --> <meta name="theme-color" content="#2196f3"> <!-- Your app title --> <title>My App</title> <!-- Path to Framework7 Library CSS, Material Theme --> <link rel="stylesheet" href="path/to/framework7.material.min.css"> <!-- Path to Framework7 color related styles, Material Theme --> <link rel="stylesheet" href="path/to/framework7.material.colors.min.css"> <!-- Path to your custom app styles--> <link rel="stylesheet" href="path/to/my-app.css"> </head> <body> <!-- Views --> <div class="views"> <!-- Your main view, should have "view-main" class --> <div class="view view-main"> <!-- Pages container, because we use fixed navbar and toolbar, it has additional appropriate classes--> <div class="pages navbar-fixed toolbar-fixed"> <!-- Page, "data-page" contains page name --> <div data-page="index" class="page"> <!-- Top Navbar. In Material theme it should be inside of the page--> <div class="navbar"> <div class="navbar-inner"> <div class="center">Awesome App</div> </div> </div> <!-- Toolbar. In Material theme it should be inside of the page--> <div class="toolbar"> <div class="toolbar-inner"> <!-- Toolbar links --> <a href="#" class="link">Link 1</a> <a href="#" class="link">Link 2</a> </div> </div> <!-- Scrollable page content --> <div class="page-content"> <p>Page content goes here</p> <!-- Link to another page --> <a href="about.html">About app</a> </div> </div> </div> </div> </div> <!-- Path to Framework7 Library JS--> <script type="text/javascript" src="path/to/framework7.min.js"></script> <!-- Path to your app js--> <script type="text/javascript" src="path/to/my-app.js"></script> </body> </html> |
Once done, delete all other existing html files from www folder. The files inside the www folder should look like this:

For starters, the index file is the starting point of any application and all the necessary JS and CSS files are loaded from here. Next, we will reference all JS and CSS files in our index.html. Search for <link rel=”stylesheet” href=”path/to/ and change path/to to css, and make sure that every CSS declaration looks like this <link rel=”stylesheet” href=”css/framework7.material.min.css”>. Similarly for JS, search for <script type=”text/javascript” src=”path/to and change path/to to js, and make sure that every JS declaration looks like this <script type=”text/javascript” src=”js/framework7.min.js”></script>. Post these changes the index.html should look like this:
1 2 3 4 5 6 7 8 9 10 11 12 13 14 15 16 17 18 19 20 21 22 23 24 25 26 27 28 29 30 31 32 33 34 35 36 37 38 39 40 41 42 43 44 45 46 47 48 49 50 51 52 53 54 55 56 57 | <!DOCTYPE html> <html> <head> <!– Required meta tags–> <meta charset=”utf-8″> <meta name=”viewport” content=”width=device-width, initial-scale=1, maximum-scale=1, minimum-scale=1, user-scalable=no, minimal-ui”> <meta name=”apple-mobile-web-app-capable” content=”yes”> <!– Color theme for statusbar –> <meta name=”theme-color” content=”#2196f3″> <!– Your app title –> <title>My App</title> <!– Path to Framework7 Library CSS, Material Theme –> <link rel=”stylesheet” href=”css/framework7.material.min.css”> <!– Path to Framework7 color related styles, Material Theme –> <link rel=”stylesheet” href=”css/framework7.material.colors.min.css”> <!– Path to your custom app styles–> <link rel=”stylesheet” href=”css/my-app.css”> </head> <body> <!– Views –> <div class=”views”> <!– Your main view, should have “view-main” class –> <div class=”view view-main”> <!– Pages container, because we use fixed navbar and toolbar, it has additional appropriate classes–> <div class=”pages navbar-fixed toolbar-fixed”> <!– Page, “data-page” contains page name –> <div data-page=”index” class=”page”><!– Top Navbar. In Material theme it should be inside of the page–> <div class=”navbar”> <div class=”navbar-inner”> <div class=”center”>Awesome App</div> </div> </div> <!– Toolbar. In Material theme it should be inside of the page–> <div class=”toolbar”> <div class=”toolbar-inner”> <!– Toolbar links –> <a href=”#” class=”link”>Link 1</a> <a href=”#” class=”link”>Link 2</a> </div> </div> <!– Scrollable page content –> <div class=”page-content”> <p>Page content goes here</p> <!– Link to another page –> <a href=”about.html”>About app</a> </div> </div> </div> </div> </div> <!– Path to Framework7 Library JS–> <script type=”text/javascript” src=”js/framework7.min.js”></script> <!– Path to your app js–> <script type=”text/javascript” src=”js/my-app.js”></script> </body> </html> |
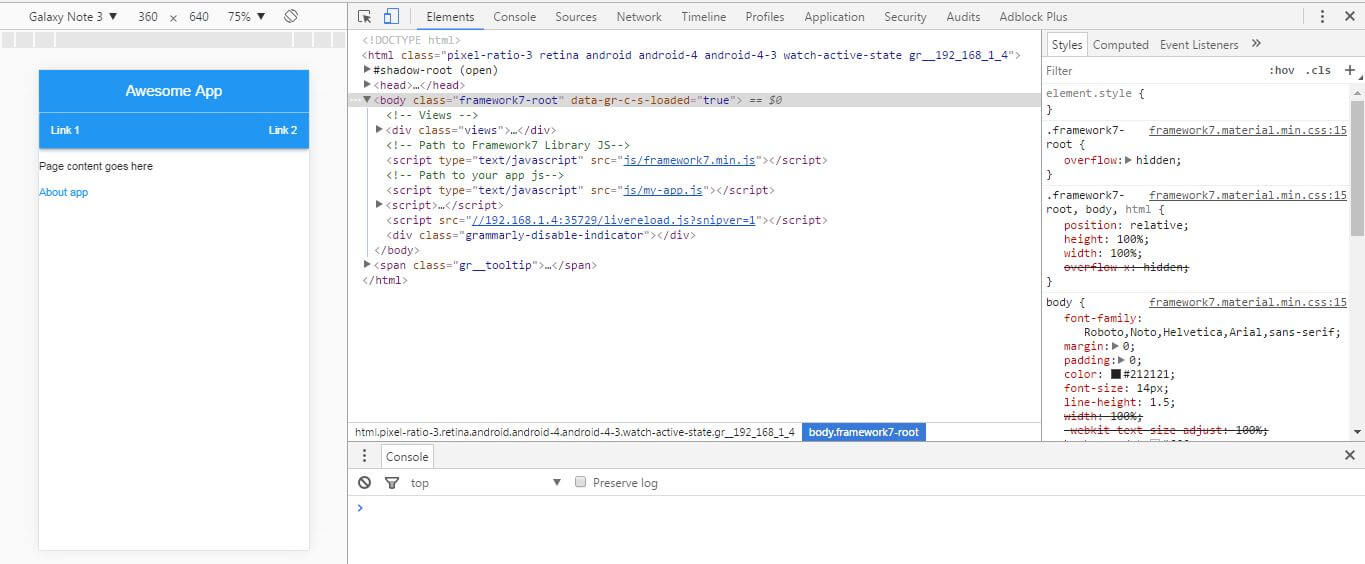
Run Index.html to see the output. If all goes well we should see something like this. For development, I personally prefer Google Chrome, one can use any other browser of their choice. If you’re using Chrome, press F12 button to go to developer console.
We are all set to implement our design, For me I want my app to look like this. You can design your app in any way you want, all it takes is your vivid imagination.
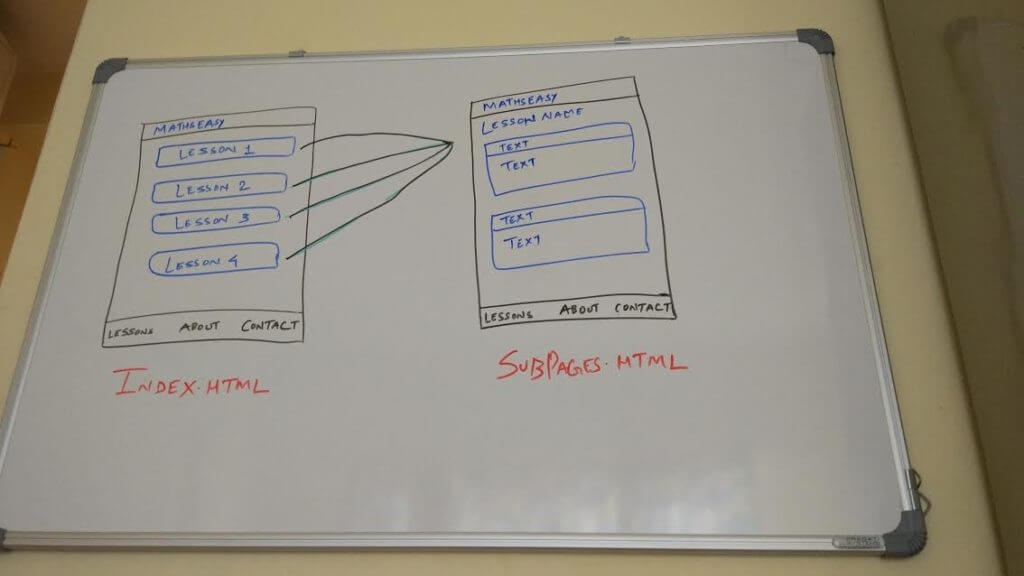
The Navbar (short for Navigation bar) at the top of the screen and Toolbar at the bottom of the screen are two things which should be consistent throughout the app. For setting up the Toolbar and navbar visit toolbar docs and navbar docs section.
Let’s edit the navbar section, in the index file. Navbar in android material theme has three sections: navbar left, navbar right and navbar center. Since as per our design we would only be showing the title so we will change the value of navbar div=”center” to Maths Easy.
Now let’s edit the toolbar. By default, the toolbar for material design is displayed at the top, but our requirement is to display it at the bottom, so in order to achieve that, we have to add a pre-defined class to the toolbar div; toolbar-bottom. After that, we will add three titles just like we see in our design; Lessons, About and Contact. Also change the app title to Maths Easy. Post changes the index.html should look like this:
1 2 3 4 5 6 7 8 9 10 11 12 13 14 15 16 17 18 19 20 21 22 23 24 25 26 27 28 29 30 31 32 33 34 35 36 37 38 39 40 41 42 43 44 45 46 47 48 49 50 51 52 53 54 55 56 57 58 59 60 61 62 63 | <!DOCTYPE html> <html> <head> <!– Required meta tags–> <meta charset=”utf-8″> <meta name=”viewport” content=”width=device-width, initial-scale=1, maximum-scale=1, minimum-scale=1, user-scalable=no, minimal-ui”> <meta name=”apple-mobile-web-app-capable” content=”yes”> <!– Color theme for statusbar –> <meta name=”theme-color” content=”#2196f3″> <!– Your app title –> <title>Maths Easy</title> <!– Path to Framework7 Library CSS, Material Theme –> <link rel=”stylesheet” href=”css/framework7.material.min.css”> <!– Path to Framework7 color related styles, Material Theme –> <link rel=”stylesheet” href=”css/framework7.material.colors.min.css”> <!– Path to your custom app styles–> <link rel=”stylesheet” href=”css/my-app.css”> </head> <body> <!– Views –> <div class=”views”> <!– Your main view, should have “view-main” class –> <div class=”view view-main”> <!– Pages container, because we use fixed navbar and toolbar, it has additional appropriate classes–> <div class=”pages navbar-fixed toolbar-fixed”> <!– Page, “data-page” contains page name –> <div data-page=”index” class=”page”> <!– Top Navbar. In Material theme it should be inside of the page–> <div class=”navbar”> <div class=”navbar-inner”> <div class=”center”>Maths Easy</div> </div> </div> <!– Toolbar. In Material theme it should be inside of the page–> <div class=”toolbar toolbar-bottom”> <div class=”toolbar-inner”> <!– Toolbar links –> <div class=”toolbar-inner”> <a href=”#” class=”link”>Lessons</a> <a href=”#” class=”link”>About</a> <a href=”#” class=”link”>Contact</a> </div> </div> </div> <!– Scrollable page content –> <div class=”page-content”> <p>Page content goes here</p> <!– Link to another page –> <a href=”about.html”>About app</a> </div> </div> </div> </div> </div> <!– Path to Framework7 Library JS–> <script type=”text/javascript” src=”js/framework7.min.js”></script> <!– Path to your app js–> <script type=”text/javascript” src=”js/my-app.js”></script> </body> </html> |
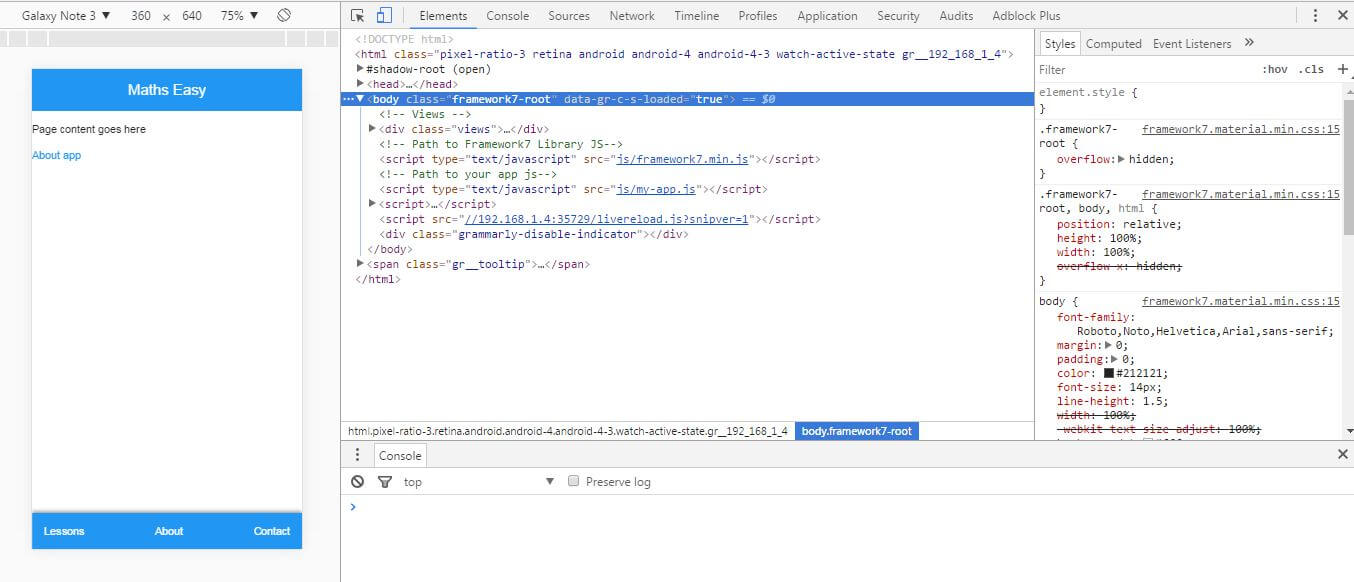
Run the app and it shoud look like this:
Lets put some icons in the toolbar alongside texts. For icons, visit the Framework7 icons section. To get started, we need to download two files from here, one is framework7-icons.css and the other is the entire fonts folder with 4 files inside it. Keep the css file inside www/css folder and fonts folder with its content inside www folder. Refrence the framework7-icons.css file inside the index.html file like <link rel=”stylesheet” href=”css/framework7-icons.css”>. For icons, the title divs insde the toolbar should be like this
For icons, the title divs insde the toolbar should be like this <a href=”#” class=”link”><i class=”f7-icons size-22″>collection</i>Lessons</a>. For displaying icons framework7 gives a predefined class called f7-icons, apart from that we have another class called size-22, which keeps the size of the icons to 22 px. It is advisable to explore icons display section for more clarity. For lessons we have used the collection icon, similarly we can do this for others. Post changes, the index.html file should look like this:
1 2 3 4 5 6 7 8 9 10 11 12 13 14 15 16 17 18 19 20 21 22 23 24 25 26 27 28 29 30 31 32 33 34 35 36 37 38 39 40 41 42 43 44 45 46 47 48 49 50 51 52 53 54 55 56 57 58 59 60 61 62 63 64 65 | <!DOCTYPE html> <html> <head> <!– Required meta tags–> <meta charset=”utf-8″> <meta name=”viewport” content=”width=device-width, initial-scale=1, maximum-scale=1, minimum-scale=1, user-scalable=no, minimal-ui”> <meta name=”apple-mobile-web-app-capable” content=”yes”> <!– Color theme for statusbar –> <meta name=”theme-color” content=”#2196f3″> <!– Your app title –> <title>Maths Easy</title> <!– Path to Framework7 Library CSS, Material Theme –> <link rel=”stylesheet” href=”css/framework7.material.min.css”> <!– Path to Framework7 color related styles, Material Theme –> <link rel=”stylesheet” href=”css/framework7.material.colors.min.css”> <!– Path to your custom app styles–> <link rel=”stylesheet” href=”css/my-app.css”> <!– Path to Framework7 icons –> <link rel=”stylesheet” href=”css/framework7-icons.css”> </head> <body> <!– Views –> <div class=”views”> <!– Your main view, should have “view-main” class –> <div class=”view view-main”> <!– Pages container, because we use fixed navbar and toolbar, it has additional appropriate classes–> <div class=”pages navbar-fixed toolbar-fixed”> <!– Page, “data-page” contains page name –> <div data-page=”index” class=”page”> <!– Top Navbar. In Material theme it should be inside of the page–> <div class=”navbar”> <div class=”navbar-inner”> <div class=”center”>Maths Easy</div> </div> </div> <!– Toolbar. In Material theme it should be inside of the page–> <div class=”toolbar toolbar-bottom”> <div class=”toolbar-inner”> <!– Toolbar links –> <div class=”toolbar-inner”> <a href=”#” class=”link”><i class=”f7-icons size-22″>collection</i>Lessons</a> <a href=”#” class=”link”><i class=”f7-icons size-22″>info</i>About</a> <a href=”#” class=”link”><i class=”f7-icons size-22″>chat</i>Contact</a> </div> </div> </div> <!– Scrollable page content –> <div class=”page-content”> <p>Page content goes here</p> <!– Link to another page –> <a href=”about.html”>About app</a> </div> </div> </div> </div> </div> <!– Path to Framework7 Library JS–> <script type=”text/javascript” src=”js/framework7.min.js”></script> <!– Path to your app js–> <script type=”text/javascript” src=”js/my-app.js”></script> </body> </html> |
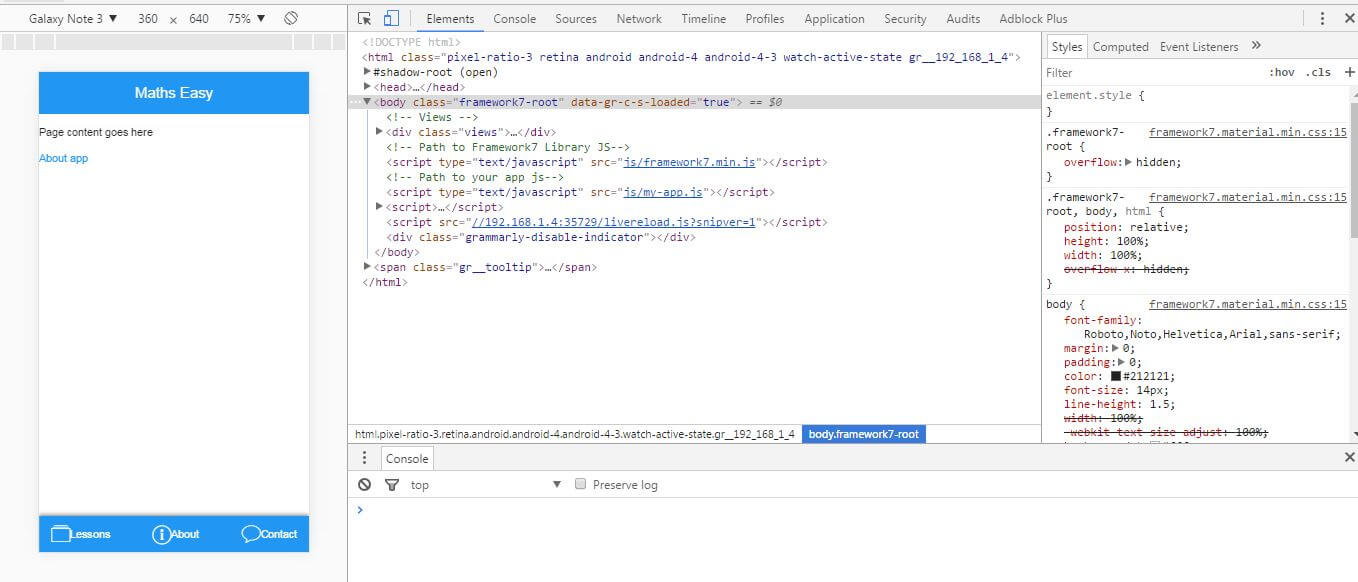
Run the app:
As per our design, we would be displaying each lesson on different pages and would be accessing those pages via buttons from the index. For buttons visit Button docs section, and write the button codes inside the page-content div. Before writing the button codes remove other contents mentioned inside page-content div. Post the changes the HTML file should like this:
1 2 3 4 5 6 7 8 9 10 11 12 13 14 15 16 17 18 19 20 21 22 23 24 25 26 27 28 29 30 31 32 33 34 35 36 37 38 39 40 41 42 43 44 45 46 47 48 49 50 51 52 53 54 55 56 57 58 59 60 61 62 63 64 65 66 67 68 69 70 71 72 | <!DOCTYPE html> <html> <head> <!– Required meta tags–> <meta charset=”utf-8″> <meta name=”viewport” content=”width=device-width, initial-scale=1, maximum-scale=1, minimum-scale=1, user-scalable=no, minimal-ui”> <meta name=”apple-mobile-web-app-capable” content=”yes”> <!– Color theme for statusbar –> <meta name=”theme-color” content=”#2196f3″> <!– Your app title –> <title>Maths Easy</title> <!– Path to Framework7 Library CSS, Material Theme –> <link rel=”stylesheet” href=”css/framework7.material.min.css”> <!– Path to Framework7 color related styles, Material Theme –> <link rel=”stylesheet” href=”css/framework7.material.colors.min.css”> <!– Path to your custom app styles–> <link rel=”stylesheet” href=”css/my-app.css”> <!– Path to Framework7 icons –> <link rel=”stylesheet” href=”css/framework7-icons.css”> </head> <body> <!– Views –> <div class=”views”> <!– Your main view, should have “view-main” class –> <div class=”view view-main”> <!– Pages container, because we use fixed navbar and toolbar, it has additional appropriate classes–> <div class=”pages navbar-fixed toolbar-fixed”> <!– Page, “data-page” contains page name –> <div data-page=”index” class=”page”> <!– Top Navbar. In Material theme it should be inside of the page–> <div class=”navbar”> <div class=”navbar-inner”> <div class=”center”>Maths Easy</div> </div> </div> <!– Toolbar. In Material theme it should be inside of the page–> <div class=”toolbar toolbar-bottom”> <div class=”toolbar-inner”> <!– Toolbar links –> <div class=”toolbar-inner”> <a href=”#” class=”link”><i class=”f7-icons size-22″>collection</i>Lessons</a> <a href=”#” class=”link”><i class=”f7-icons size-22″>info</i>About</a> <a href=”#” class=”link”><i class=”f7-icons size-22″>chat</i>Contact</a> </div> </div> </div> <!– Scrollable page content –> <div class=”page-content”> <div class=”list-block”> <ul> <li><p><a href=”#” class=”button button-big button-fill button-raised color-pink”>Number System</a></p></li> <li><p><a href=”#” class=”button button-big button-fill button-raised color-red”>Average</a></p></li> <li><p><a href=”#” class=”button button-big button-fill button-raised color-cyan”>Time Distance & Work</a></p></li> <li><p><a href=”#” class=”button button-big button-fill button-raised color-green”>Percentage</a></p></li> <li><p><a href=”#” class=”button button-big button-fill button-raised color-purple”>Profit & Loss</a></p></li> <li><p><a href=”#” class=”button button-big button-fill button-raised color-indigo”>Simple & Compound Interest</a></p></li> </ul> </div> </div> </div> </div> </div> </div> <!– Path to Framework7 Library JS–> <script type=”text/javascript” src=”js/framework7.min.js”></script> <!– Path to your app js–> <script type=”text/javascript” src=”js/my-app.js”></script> </body> </html> |
Run the app to see the changes:
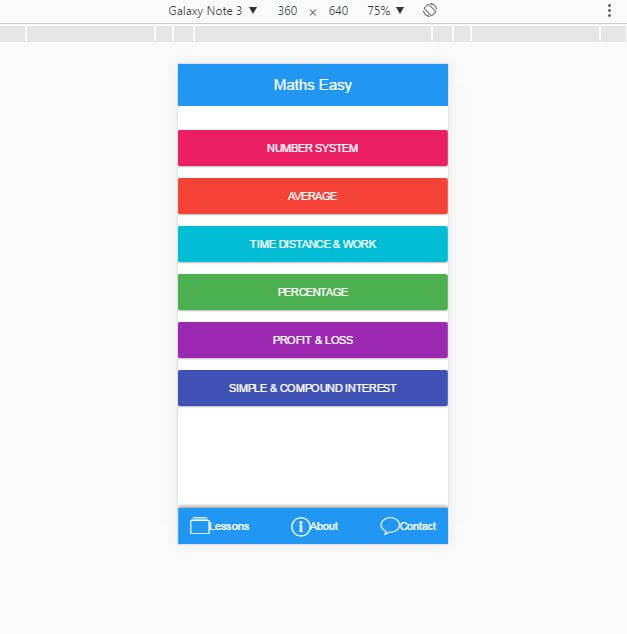
As we can see the buttons are not properly aligned in the home screen, to fix that we will use custom CSS. Using the inspect element function in chrome developer console (Box and arrow icon) we can inspect the element we want to change and accordingly apply custom CSS. It is always advisable to use a separate class for making the changes rather than applying it on any predefined classes. Lets create a class homebuttons and write it in every button’s div. As a good practice, the custom css should always be written in my-app.css file. Write the following css in www/css/my-app.css file:
1 2 3 4 5 | .homebuttons{ padding-right: 16px; padding-left: 16px; margin: 1.5em 0; } |
Post changes the HTML file should look like this:
1 2 3 4 5 6 7 8 9 10 11 12 13 14 15 16 17 18 19 20 21 22 23 24 25 26 27 28 29 30 31 32 33 34 35 36 37 38 39 40 41 42 43 44 45 46 47 48 49 50 51 52 53 54 55 56 57 58 59 60 61 62 63 64 65 66 67 68 69 70 71 72 | <!DOCTYPE html> <html> <head> <!– Required meta tags–> <meta charset=”utf-8″> <meta name=”viewport” content=”width=device-width, initial-scale=1, maximum-scale=1, minimum-scale=1, user-scalable=no, minimal-ui”> <meta name=”apple-mobile-web-app-capable” content=”yes”> <!– Color theme for statusbar –> <meta name=”theme-color” content=”#2196f3″> <!– Your app title –> <title>My App</title> <!– Path to Framework7 Library CSS, Material Theme –> <link rel=”stylesheet” href=”css/framework7.material.min.css”> <!– Path to Framework7 color related styles, Material Theme –> <link rel=”stylesheet” href=”css/framework7.material.colors.min.css”> <!– Path to your custom app styles–> <link rel=”stylesheet” href=”css/my-app.css”> <!– Path to Framework7 icons –> <link rel=”stylesheet” href=”css/framework7-icons.css”> </head> <body> <!– Views –> <div class=”views”> <!– Your main view, should have “view-main” class –> <div class=”view view-main”> <!– Pages container, because we use fixed navbar and toolbar, it has additional appropriate classes–> <div class=”pages navbar-fixed toolbar-fixed”> <!– Page, “data-page” contains page name –> <div data-page=”index” class=”page”> <!– Top Navbar. In Material theme it should be inside of the page–> <div class=”navbar”> <div class=”navbar-inner”> <div class=”center”>Maths Easy</div> </div> </div> <!– Toolbar. In Material theme it should be inside of the page–> <div class=”toolbar toolbar-bottom”> <div class=”toolbar-inner”> <!– Toolbar links –> <div class=”toolbar-inner”> <a href=”#” class=”link”><i class=”f7-icons size-22″>collection</i>Lessons</a> <a href=”#” class=”link”><i class=”f7-icons size-22″>info</i>About</a> <a href=”#” class=”link”><i class=”f7-icons size-22″>chat</i>Contact</a> </div> </div> </div> <!– Scrollable page content –> <div class=”page-content”> <div class=”list-block”> <ul> <li><p class=”homebuttons”><a href=”#” class=”button button-big button-fill button-raised color-pink”>Number System</a></p></li> <li><p class=”homebuttons”><a href=”#” class=”button button-big button-fill button-raised color-red”>Average</a></p></li> <li><p class=”homebuttons”><a href=”#” class=”button button-big button-fill button-raised color-cyan”>Time Distance & Work</a></p></li> <li><p class=”homebuttons”><a href=”#” class=”button button-big button-fill button-raised color-green”>Percentage</a></p></li> <li><p class=”homebuttons”><a href=”#” class=”button button-big button-fill button-raised color-purple”>Profit & Loss</a></p></li> <li><p class=”homebuttons”><a href=”#” class=”button button-big button-fill button-raised color-indigo”>Simple & Compound Interest</a></p></li> </ul> </div> </div> </div> </div> </div> </div> <!– Path to Framework7 Library JS–> <script type=”text/javascript” src=”js/framework7.min.js”></script> <!– Path to your app js–> <script type=”text/javascript” src=”js/my-app.js”></script> </body> </html> |
Lets run the app after applying custom css:
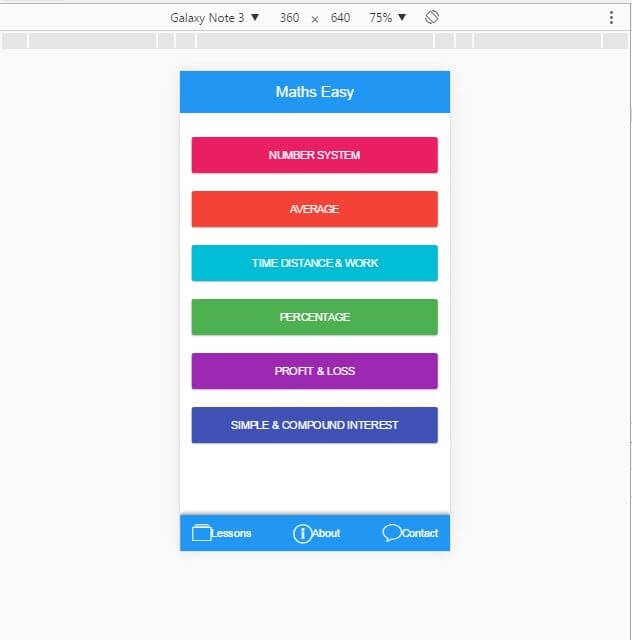
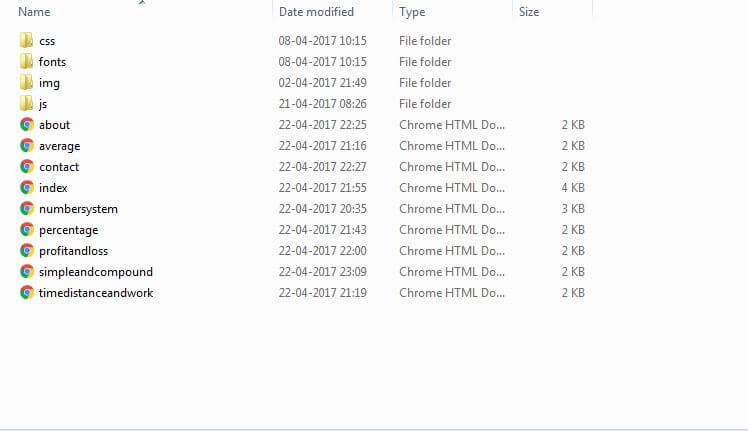
The buttons are now properly aligned, but still there are other elements that can be changed or enhanced via custom css but for now lets keep it as it is. Next is to create separate html pages for each of the lessons as well as for about and contact. The index page will be our Lessons page and we will link the respective pages to the respective buttons using a href tag. Post page creation the folder structure should look like this:
and the index.html like this:
1 2 3 4 5 6 7 8 9 10 11 12 13 14 15 16 17 18 19 20 21 22 23 24 25 26 27 28 29 30 31 32 33 34 35 36 37 38 39 40 41 42 43 44 45 46 47 48 49 50 51 52 53 54 55 56 57 58 59 60 61 62 63 64 65 66 67 68 69 70 71 72 | <!DOCTYPE html> <html> <head> <!– Required meta tags–> <meta charset=”utf-8″> <meta name=”viewport” content=”width=device-width, initial-scale=1, maximum-scale=1, minimum-scale=1, user-scalable=no, minimal-ui”> <meta name=”apple-mobile-web-app-capable” content=”yes”> <!– Color theme for statusbar –> <meta name=”theme-color” content=”#2196f3″> <!– Your app title –> <title>My App</title> <!– Path to Framework7 Library CSS, Material Theme –> <link rel=”stylesheet” href=”css/framework7.material.min.css”> <!– Path to Framework7 color related styles, Material Theme –> <link rel=”stylesheet” href=”css/framework7.material.colors.min.css”> <!– Path to your custom app styles–> <link rel=”stylesheet” href=”css/my-app.css”> <!– Path to Framework7 icons –> <link rel=”stylesheet” href=”css/framework7-icons.css”> </head> <body> <!– Views –> <div class=”views”> <!– Your main view, should have “view-main” class –> <div class=”view view-main”> <!– Pages container, because we use fixed navbar and toolbar, it has additional appropriate classes–> <div class=”pages navbar-fixed toolbar-fixed”> <!– Page, “data-page” contains page name –> <div data-page=”index” class=”page”> <!– Top Navbar. In Material theme it should be inside of the page–> <div class=”navbar”> <div class=”navbar-inner”> <div class=”center”>Maths Easy</div> </div> </div> <!– Toolbar. In Material theme it should be inside of the page–> <div class=”toolbar toolbar-bottom”> <div class=”toolbar-inner”> <!– Toolbar links –> <div class=”toolbar-inner”> <a href=”index.html” class=”link”><i class=”f7-icons size-22″>collection</i>Lessons</a> <a href=”about.html” class=”link”><i class=”f7-icons size-22″>info</i>About</a> <a href=”contact.html” class=”link”><i class=”f7-icons size-22″>chat</i>Contact</a> </div> </div> </div> <!– Scrollable page content –> <div class=”page-content”> <div class=”list-block”> <ul> <li><p class=”homebuttons”><a href=”numbersystem.html” class=”button button-big button-fill button-raised color-pink”>Number System</a></p></li> <li><p class=”homebuttons”><a href=”average.html” class=”button button-big button-fill button-raised color-red”>Average</a></p></li> <li><p class=”homebuttons”><a href=”timedistanceandwork.html” class=”button button-big button-fill button-raised color-cyan”>Time Distance & Work</a></p></li> <li><p class=”homebuttons”><a href=”percentage.html” class=”button button-big button-fill button-raised color-green”>Percentage</a></p></li> <li><p class=”homebuttons”><a href=”profitandloss.html” class=”button button-big button-fill button-raised color-purple”>Profit & Loss</a></p></li> <li><p class=”homebuttons”><a href=”simpleandcompound.html” class=”button button-big button-fill button-raised color-indigo”>Simple & Compound Interest</a></p></li> </ul> </div> </div> </div> </div> </div> </div> <!– Path to Framework7 Library JS–> <script type=”text/javascript” src=”js/framework7.min.js”></script> <!– Path to your app js–> <script type=”text/javascript” src=”js/my-app.js”></script> </body> </html> |
To display mathematical expressions we would be using Mathjax. Mathjax is a javascript engine which displays Mathematical expressions in webpages. For Mathjax to work we have to import MathJax.js into our Index.html file, using <script type=”text/javascript” src=”https://cdnjs.cloudflare.com/ajax/libs/mathjax/2.7.0/MathJax.js?config=TeX-MML-AM_CHTML”></script>. We can get more details on this from their Docs section. To create the Maths expression, I used Hostmaths and wrote the maths expression like $$MathsExp$$ in the html page.
Let’s create any one lessons page and similarly we can create others. First, copy from <div data-page=index class=”page”> up till its div closure from index.html and copy it to numbersystem.html. Make sure to change the value of data-page value to numbersystem, as it corresponds to page name and should be unique for every page. In the navigation bar of numbersystem a back button should be displayed. clicking on it will bring us back to the previous screen. <div class=”left”><a href=”index.html” class=”link”><i class=”f7-icons size-22″>chevron_left</i></a></div> inside navbar-inner class will do the job, rest all will be same for Navbar. No changes for Toolbar, it will be as it is. Inside the page-content section, we will be using cards to display our data. To know more, visit Card Docs section. We will be using Card Header and Card content . In the subpages we don’t have to call JS and CSS again, as this is taken care by Framework7. Post all the changes the numbersystem.html file should look like this:
1 2 3 4 5 6 7 8 9 10 11 12 13 14 15 16 17 18 19 20 21 22 23 24 25 26 27 28 29 30 31 32 33 34 35 36 37 38 39 40 41 42 43 44 45 46 47 48 49 50 51 | <div data-page=”numbersystem” class=”page”> <div class=”navbar”> <div class=”navbar-inner”> <div class=”left”><a href=”index.html” class=”link”><i class=”f7-icons size-22″>chevron_left</i></a></div> <div class=”center”>Maths Easy</div> </div> </div> <div class=”toolbar toolbar-bottom”> <div class=”toolbar-inner”> <a href=”index.html” class=”link”><i class=”f7-icons size-22″>collection</i>Lessons</a> <a href=”about.html” class=”link”><i class=”f7-icons size-22″>info</i>About</a> <a href=”contact.html” class=”link”><i class=”f7-icons size-22″>chat</i>Contact</a> </div> </div> <div class=”page-content”> <div class=”content-block-title”>Number System</div> <div class=”card”> <div class=”card-header”>Calculating Square if all digits are 3</div> <div class=”card-content”> <div class=”card-content-inner”> <p>The trick is to repeat 1 and 8 (n-1) times where n is the number of times 3 is repeated.</p> <p>$$(33)^2=1089$$</p> <p>$$(333)^2=110889$$</p> <p>$$(3333)^2=11108889$$</p> </div> </div> </div> <div class=”card”> <div class=”card-header”>To know whether a number is Prime or not ?</div> <div class=”card-content”> <div class=”card-content-inner”> <p>First of all calculate the approximate square root of the number. Now, Divide the number by the prime numbers lesser than the approximate square root value. If the given number is not divisible by any of these number, then the number is Prime. If the number is divisible by any of the number then its Not Prime.</p> <p>Eg: To calculate whether 367 is prime or not?</p> <p>Approximate square root is 19. So Prime numbers less than 19 are 2,3,5,7,11,13,17. 367 is not divisble by 2,3,5,7,11,13,17; Hence 367 a prime number.</p> </div> </div> </div> <div class=”card”> <div class=”card-header”>To calculate Sum of N natural Number</div> <div class=”card-content”> <div class=”card-content-inner”> <p>For starters Whole Numbers start from 0 & Natural Number start from 1.</p> <p>Sum of n natural numbers: $$\frac{n(n+1)}{2}$$</p> <p>Sum of n even number: $${n(n+1)}$$</p> <p>Sum of n odd number:$${n^2}$$</p> </div> </div> </div> </div> </div> |
Run the app and click on Number system:
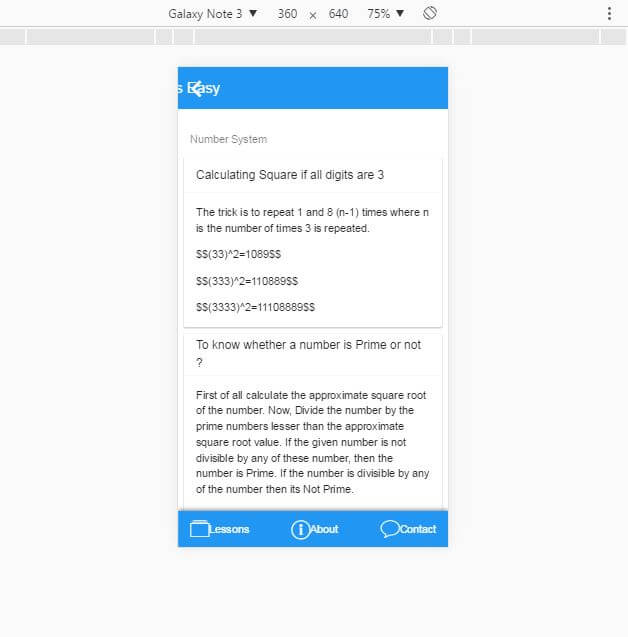
The contents of the Header are not properly aligned and that is because we haven’t initialized the App with material specific behavior. With Framework7, we can pass parameters on app initialization which gives us hassle-free customization throughout the app. Visit Initialize App docs section for more info. For material specific behavior we will pass material parameter on app initialization. The material is of type boolean so we will write var myApp = new Framework7({material: true,}); in my-app.js file.
The second issue that we are facing is that the maths expressions are not getting loaded on the page. For that we have to visit the Mathsjax docs again. In the “Modifying Math on the page” section, it is mentioned that we have to initialize MathJax.Hub.Typeset() class on page initialization for dynamic web pages. I personally faced lots of challenges resolving this issue. So to make the change, again we will write myApp.onPageInit(‘*’, function () {MathJax.Hub.Typeset();}); in my-app.js file. We have given * because we will have Maths content on each page, so instead of initializing separately for every page, we did it once for all. So post these two changes, my-app.js file should look like this:
1 2 3 4 5 6 7 8 9 10 11 12 13 14 15 16 17 18 19 20 21 22 23 24 25 26 27 28 29 30 31 32 33 34 35 36 37 38 39 40 41 42 43 44 45 46 47 | // Initialize your app var myApp = new Framework7({ material: true, PushState: true, }); // Export selectors engine var $$ = Dom7; // Add view var mainView = myApp.addView('.view-main', { // Because we use fixed-through navbar we can enable dynamic navbar dynamicNavbar: false, }); myApp.onPageInit('*', function () { MathJax.Hub.Typeset(); }); // Generate dynamic page var dynamicPageIndex = 0; function createContentPage() { mainView.router.loadContent( '<!-- Top Navbar-->' + '<div class="navbar">' + ' <div class="navbar-inner">' + ' <div class="left"><a href="#" class="back link"><i class="icon icon-back"></i><span>Back</span></a></div>' + ' <div class="center sliding">Dynamic Page ' + (++dynamicPageIndex) + '</div>' + ' </div>' + '</div>' + '<div class="pages">' + ' <!-- Page, data-page contains page name-->' + ' <div data-page="dynamic-pages" class="page">' + ' <!-- Scrollable page content-->' + ' <div class="page-content">' + ' <div class="content-block">' + ' <div class="content-block-inner">' + ' <p>Here is a dynamic page created on ' + new Date() + ' !</p>' + ' <p>Go <a href="#" class="back">back</a> or go to <a href="services.html">Services</a>.</p>' + ' </div>' + ' </div>' + ' </div>' + ' </div>' + '</div>' ); return; } |
Run the App and the Numbersystem page should look like this:
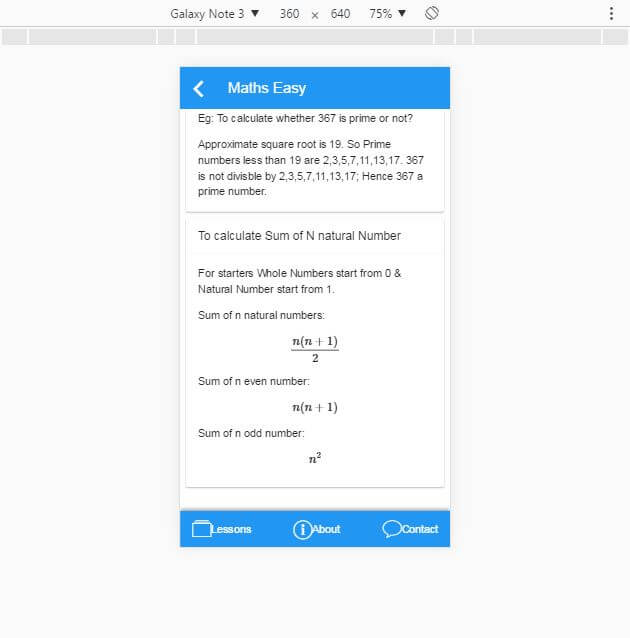
Since we have successfully created one lesson, we can now copy the html code to other Lesson pages and change the content we want to display along with the data-page name.
Next we will create about and contact pages. These are different from our lessons page, so we will not be using cards here. Same as earlier, from numbersystem.html copy from page-content div to its closure to contact.html and under page-content div write the content under content-block div. We won’t be needing the back button on About and Contact pages, so make sure to remove that. Post the changes contact page should look like this:
1 2 3 4 5 6 7 8 9 10 11 12 13 14 15 16 17 18 19 20 21 | <div data-page=”contact” class=”page”> <div class=”navbar”> <div class=”navbar-inner”> <div class=”center”>Maths Easy</div> </div> </div> <div class=”toolbar toolbar-bottom”> <div class=”toolbar-inner”> <a href=”index.html” class=”link”><i class=”f7-icons size-22″>collection</i>Lessons</a> <a href=”about.html” class=”link”><i class=”f7-icons size-22″>info</i>About</a> <a href=”contact.html” class=”link”><i class=”f7-icons size-22″>chat</i>Contact</a> </div> </div> <div class=”page-content”> <div class=”content-block-title”>Contact</div> <div class=”content-block”> <p>Aestibulum pretium dolor et sagittis malesuada. Aliquam nec quam ac magna sodales venenatis id eget felis. Praesent ante metus, laoreet in nulla eget, dapibus maximus libero. Aenean iaculis ipsum at nisl venenatis, nec dignissim ipsum egestas. Mauris in orci id elit auctor convallis. Sed in sagittis diam. Pellentesque habitant morbi tristique senectus et netus et malesuada fames ac turpis egestas. Mauris viverra lorem non eros elementum varius. Nullam turpis quam, malesuada ut lacus vitae, egestas ultricies justo. Nullam a orci erat. In et posuere massa. Curabitur viverra lorem libero, ornare suscipit leo rhoncus id.</p> <p>Vestibulum risus massa, pretium in quam rutrum, venenatis commodo mauris. Nam eget bibendum felis, vel fringilla ipsum. Aliquam nec turpis vitae augue semper aliquam blandit eu enim. Class aptent taciti sociosqu ad litora torquent per conubia nostra, per inceptos himenaeos. Suspendisse imperdiet felis a diam tempor commodo.</p> </div> </div> |
On running the app, the contact page should look like this:
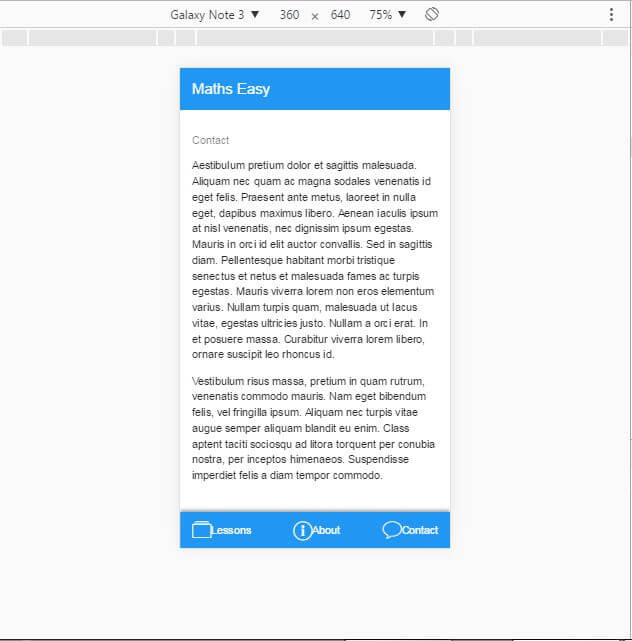
Similarly, create about page. Our app is nearly finished. Cross verify that all the buttons are pointing to right pages. Check the contents on each page and check for spelling mistakes. Once that’s done, we will create an apk file and run it on an Android device to check whether everything is working as expected.
To create the build, first of all, we need to install the latest versions of Java JDK and JRE. It’s available on official java website. After a successful install, save the paths for JDK and JRE bin folders in the system environment variables. Google, in case you have doubts regarding setting environment variables or post your queries here.
Next, we would be requiring Android SDK. There are two ways to install Android SDK. One, we can download it separately and secondly we can download and install it along with Android Studio. I personally prefer the second option as I have faced issues with the first option. Once SDK is downloaded, update its path to the environment variables. Google, if you’re facing any issues or post your queries here.
Once we are done with Java and Android SDK setup, add the Android platform to the project. Open CMD, go to the project Root folder and type in the command cordova platform add android.
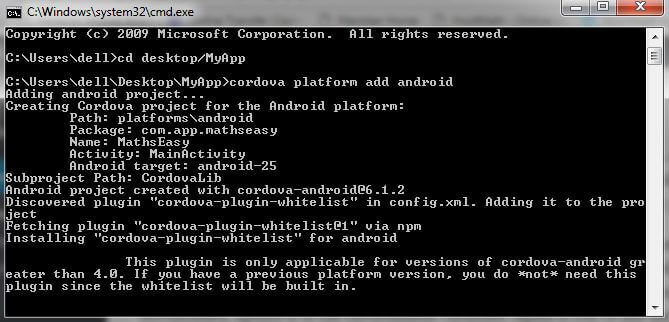
To build the APK, run the command cordova build android and if everything goes well, we can see our apk file at \platforms\android\build\outputs\apk.
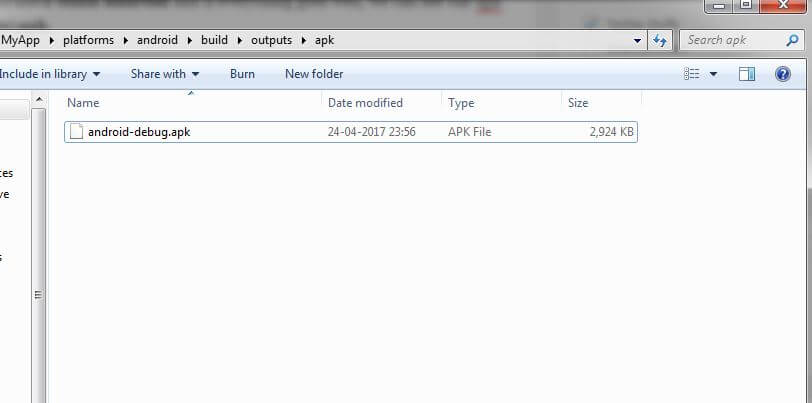
Copy the debug apk file on your android phone. Click on it to install. That’s it you’re done. Congratulations! You’ve created your first Android App.
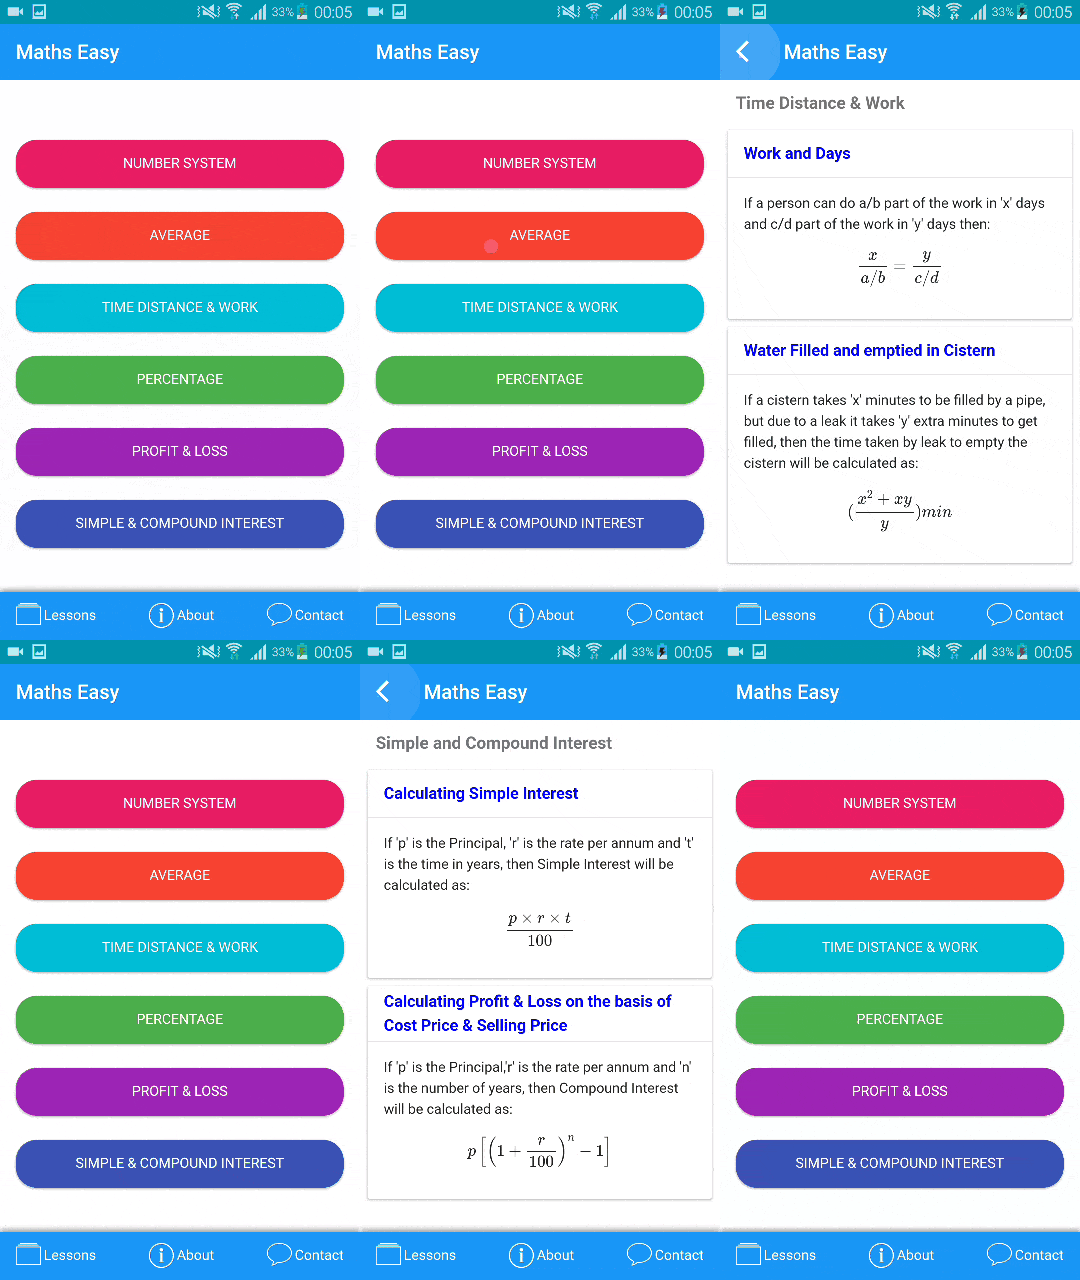
For reference, I have uploaded the entire Project on Github. You can download it from here. In case you are getting stuck somewhere or have any doubts you can post them here. Hope you’ve liked this tutorial. Let me know in the comments on how you’re building your Android app.
-> For Help: https://muut.com/letsbuild/
-> Click Here to go the1st part of the tutorial.
-> Note: At the time of creating this tutorial, there was only one version of framework7. But few days before Framework7 v2 was launched. So to avoid any confusion let me clarify that this tutorial is based on Framework7 v1.
-> Recently My App Cool Websites got Published in Framework7 Showcase. Please install it and let me know if you liked it or not.
-> Update Logs:
- Update1[16 Jan 2018] – Updated all the links as per Framework7 v1.
- Update2[22 July 2018] – Added Framework7 Showcase Link.
- Update3[01 Apr 2019] – Updated Code Snippets.

good job aalapan … Keep it up
Thnks a lot Tomesh 🙂
Thanks for this great selfless contribution. Thanks to for Easter
Thanks for Your Comment and Happy Easter to you too 🙂
Great post , thank you!
Thanks for your comment Ruowen 🙂
I have a big problem and cannot work it out. I just posted it in the framework 7 and would like to know what is your idea on that please:
http://forum.framework7.io/t/how-to-access-common-functions-on-different-pages/3015
When I add my .js files in the footer of the index.html my functions are available in that view but as soon as I load a page, none of the functions in the js file are available. I hope I do not have to create the functions manually on page:init separately, it will ne a nightmare..I just want to share the functions globally in my app, both on pages and main view when the app launched.
If you know how deal with this issue, please let me know:-)
Thank you.
Saved me a lot of time and money.I was able to create prototypes within a week’s time. THANK YOU SO MUCH !!
Thanks for your kind words Vipul 🙂
Hi, can you help me calling a new page ? this doesn’t work my second page have no css i think that this is a problem with Framework7 but i didn’t find the solution in the documentation…
Hey, To answer your query I would need some more details, can you provide that here -> https://muut.com/letsbuild/. Explain in detail what you’re trying to achieve and what issue you’re facing with all the code snippets that you’ve written.
Thanks for your tutorial part 1 and 2!!!, is possible in part 3 describe the step-by-step procedure to upload the generated application (apk) to the playstore, how to make new updates to the application and if possible how to add a means of monetization for example admob to the application .. Thank you very much for your time friend and greetings!