Recently, I published my first android app on Play Store and let me tell you it’s not as hard as you think. There are plenty of open source tools out there which makes the task easy; and Google will have answers to almost all your hiccups that you’ll face during your journey.
To start off, let’s discuss the types of Mobile App. There are primarily 3 basic types of mobile applications:
1. Web App
2. Native App
3. Hybrid App
Web Apps are such applications which run on a Web Browser. For example, Flipkart.com or Myntra.com are examples of web apps.
Native Apps are those which are built on proprietary software provided by the OS manufacturers like Android Studio for Android or Xcode for iOS etc. They use the native features of a mobile device in the most efficient way which results in good App performance, Graphics etc. But they have one drawback native apps are platform specific, Android app will work on Android phones/tablets or iOS apps will work only on iPhone/iPad etc.
Hybrid Apps are platform independent. Once created it can be run on any platforms like Android, iOS, Windows etc. They are built on HTML, CSS, and JS.
So in this post, I will talk about a Hybrid App Framework, Framework7, which I used to develop my app. The framework is totally open sourced and is continuously evolving.
I will not be sharing the exact process, but yes I will give you an outline which will be enough for you to get started and also at the end of the post there is a forum; you can post your questions/doubts there and we can work together to solve them. Let’s get started.
- First of all, you need to install Node JS in your system. Go to Nodejs.org & download the installer file for Windows and install it. People from all around the globe have built thousands of open-source libraries for Node.js – most of them hosted on the npm website. NPM (node package manager) is the default package manager for the JavaScript runtime environment Node.js. Using npm only we will install rest of the things that we require for our development; instead of going to respective websites and downloading them.
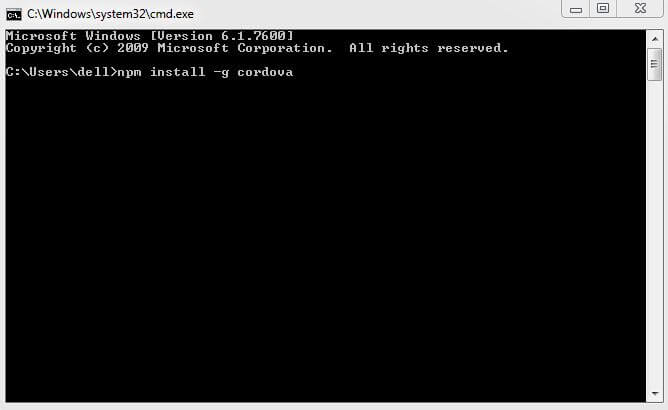
- The next thing that we have to do is to install Cordova. Apache Cordova enables us to build applications for mobile devices using CSS, HTML, and JavaScript instead of relying on platform-specific APIs like those in Android, iOS, or Windows Phone. It enables wrapping up of CSS, HTML, and JavaScript code depending upon the platform of the device. It extends the features of HTML and JavaScript to work with the device. Long Story short, it takes the Html, CSS and Js files and wraps it as per the Mobile platform like Android, IOS, Windows phone etc. To install Cordova go to Run -> CMD, write the command and press Enter. npm install -g cordova
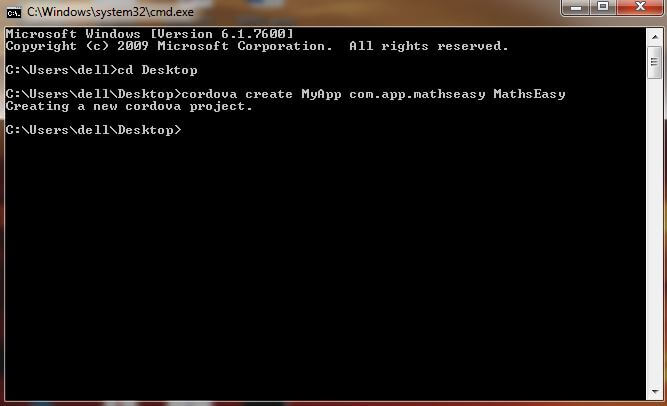
- Next, on the list is creating a Cordova project. This is where all the magic happens. Go to CMD and then go to the location where you want your project to be. For example, if you want your project in Desktop, change the directory to Desktop using the CD command and then run the command: So for example if my App folder name is MyApp, the domain is com.app.mathseasy and app name is MathsEasy; you should run the command as:cordova createMake sure that the app domain name is in the format of com.app.MyAppname.cordova create MyApp com.app.mathseasy MathsEasy
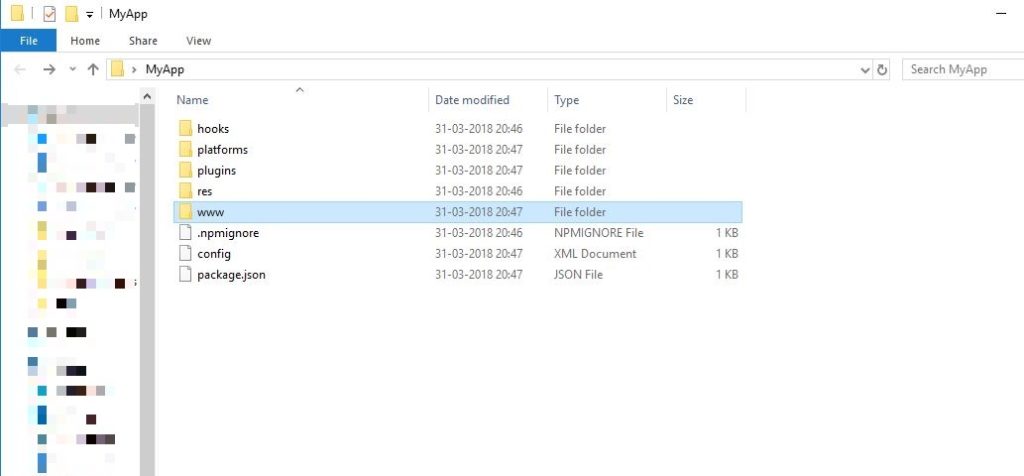
- Now, download the framework 7 starter template. Starter template helps you with the start you need to create the app. Go to the Framework7 v1 GitHub repository and download the project: Download Link. Make sure you download the zip file outside the project folder. Once downloaded, unzip it, go to dist folder; copy all the files and paste it into the www folder of the Cordova project.
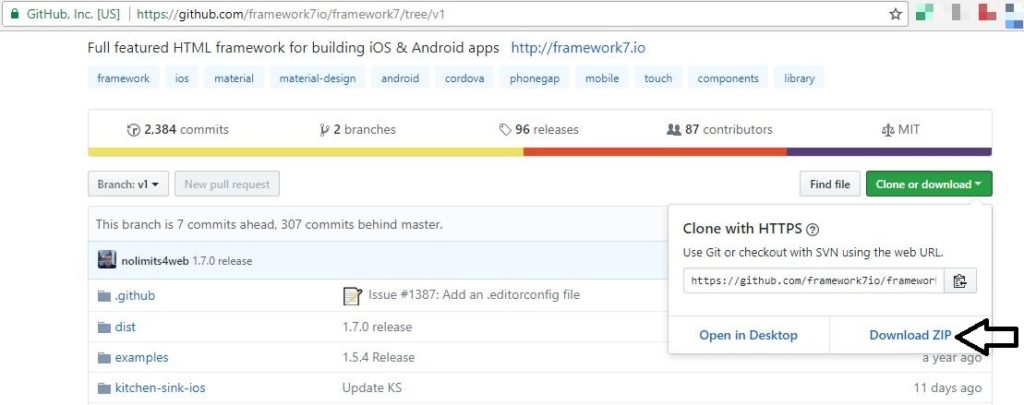
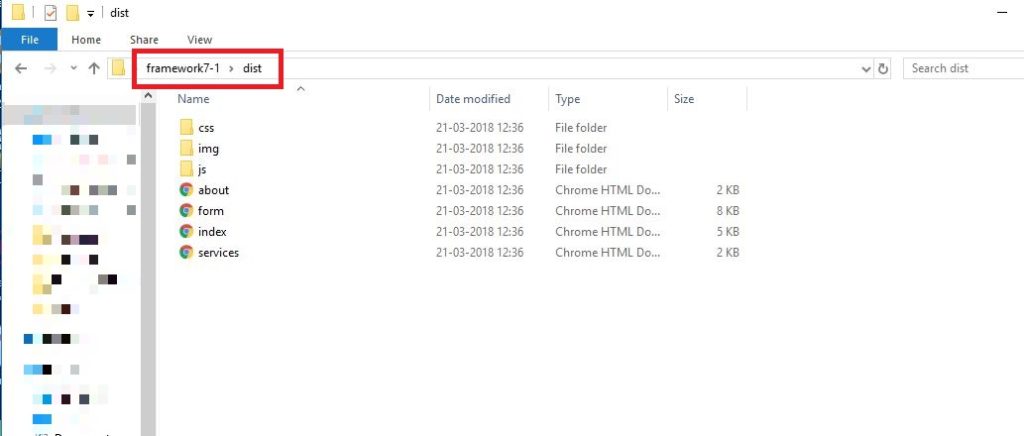
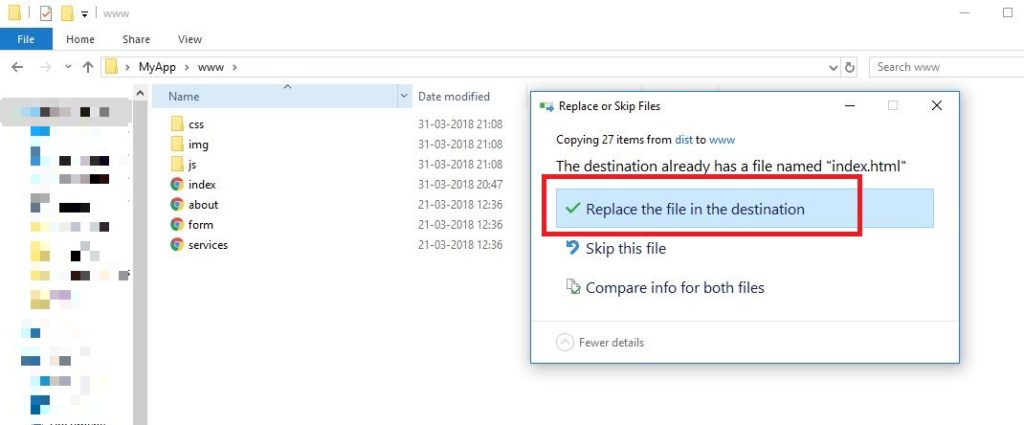
- Now to host our project on a server we would be using http-serve. To install http-serve, go to cmd, write the command and press Enter. npm i -g http-serve
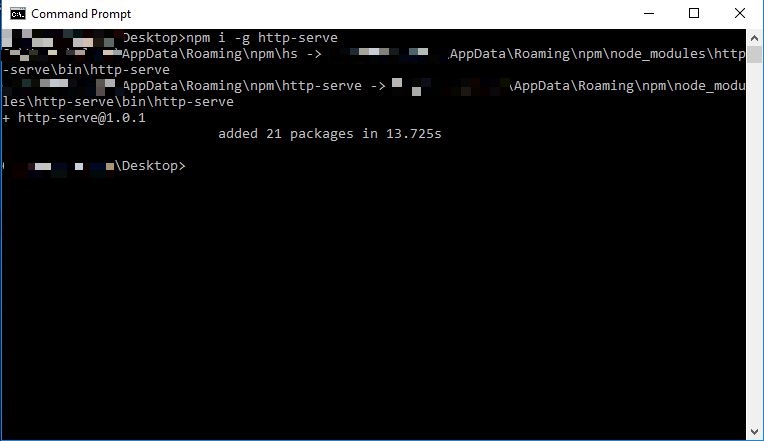
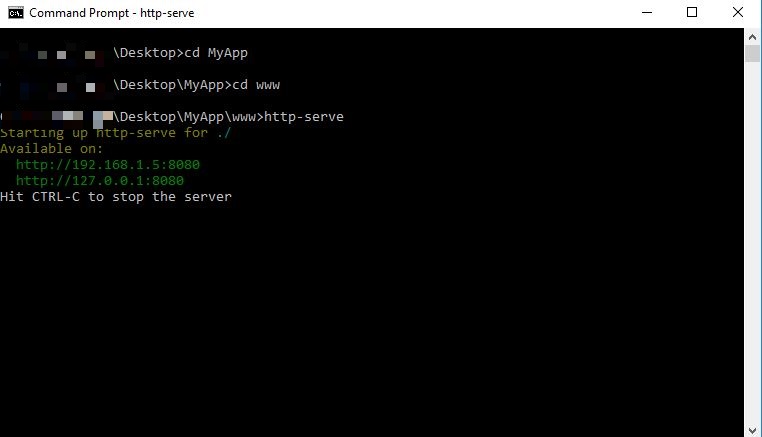
- To run our project on the server, go to www folder using the command cd MyApp first and then cd www on the command prompt. Now when you are inside www folder run the following command http-serve
- Now open any browser and go to http://localhost:8080
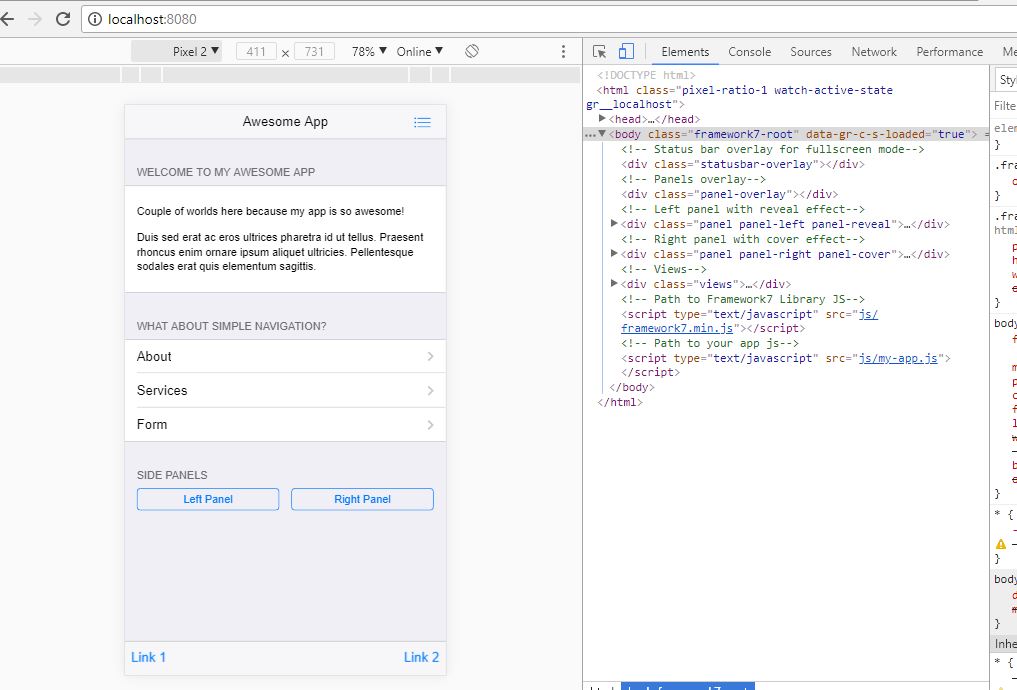
From here on you have to just get that artist out of you. The best part about using Framework7 is that you get ready made codes, you just have to paste it into your project and rest will be taken care of. Browse the Docs section, there are tons of functionalities and features to be explored. Go through the Docs content one by one, make changes in the starter template and you’re good to go. If you need a crash course on basic Html, js, and CSS, go to W3schools. If you’re stuck anywhere you can post your queries on Stackoverflow or you can post them at Framework7’s official forum. And remember, Google is your best friend so use it to your fullest.
There are chances you might not get answers to your queries because these are big forums and many a time your queries will get unheard, I have experienced that myself. So to tackle that I have created a forum to make sure that all your queries are addressed. So start building, Keep Failing and Keep Learning. I have mentioned Failing because if you don’t fail, you won’t learn.
-> Forum Link: https://muut.com/letsbuild/
-> The next Part of this tutorial is covered here.
-> Note: At the time of creating this tutorial, there was only one version of framework7. But few days before Framework7 v2 was launched. So to avoid any confusion let me clarify that this tutorial is based on Framework7 v1.
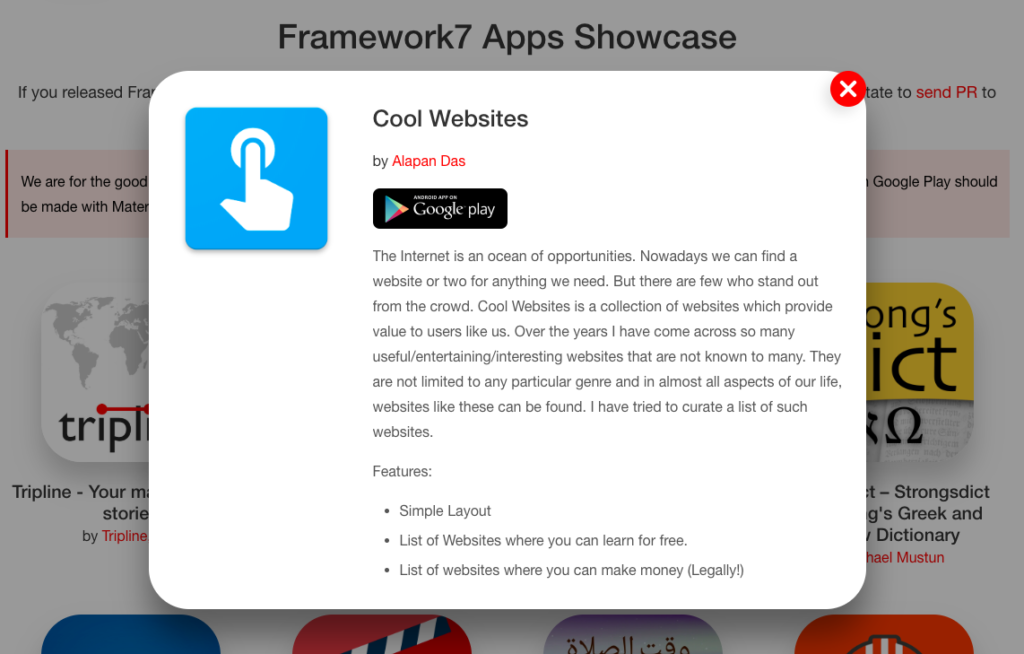
-> Recently My App Cool Websites got Published in Framework7 Showcase. Please install it and let me know if you liked it or not.
-> Update Logs:
- Update1[16 Jan 2018] – Updated all the links as per Framework7 v1.
- Update2[31 Mar 2018] – Removed Ionic and updated the article with HTTP-Serve.
- Update3[22 July 2018] – Added Framework7 Showcase Link.
Thanks for the article. How we will get APK file here?
After completing the project you need to do the following things in the cmd prompt in the project folder:
1. Install Cordova using npm (npm install -g cordova@latest)
2. Next, you have to add a platform as Android using (cordova platform add android).
3. Then create an apk file using (Cordova build android). This will create the apk file inside project_folder > platform > android > build/ > output > apk (Note: You might get an error for Gradle not present, for that you would require Gradle to be downloaded and set in the Environment variable path.)
Hope it Helps 🙂
how do i download gradle and how to set envirmental value i am kinda confused
Hi Akash, Please check the part-2 of this tutorial and I hope It will clear your query. In case you have more queries You can post it on the forum.
can we publish this apk file on playstore
if not
please suggest me how to upload this apk on playstore
thank you for these great article
Yes, we can publish the app on play store. I have published an app made completely from Framework7 on Play Store. You can check it out here. Although this article doesn’t cover the steps on how to publish an app on play store, but you can google for the step by step tutorial.
thanks a lot i got this completely clear thank you sir
Glad it helped you 🙂
thanks for the post i just want to know how to get links in button and how to getside bar
Hi Akash, I would like you to explore the Part 2 of this tutorial and you will find all the answers there. Link to Part-2
How can i use the official the framework 7 not the starter template pls help
In starter template some features are not avalable
Hi Santosh, I have used the official template only which can be found in dist folder.Link. Apart from this you can also explore kitchen sink template as well – Kitchen Sink(Android) | Kitchen Sink(iOS)
how can I install the application created into my phone
Create an apk and copy the apk on your phone and install it.
Thank you very much. I really appreciate the guidance.
Your Welcome 🙂
Thank you so much for this tutorial!!! I spent an entire day trying to download/install F7; and after surfing the entire web I finally got things working thanks to this! :)) Thank you once again!
Glad it helped you Paula 🙂
sir can u make a tutorial on how to ad admob ads in you framework 7 app pls
Surely will do that.
Yes sir been searching for this topic fr a long time pls make blog on this topic
I could not resist commenting. Exceptionally well written!
Nice Post. Thanks!
Hi now i am working in cordova using mobile application, how to integrate on framewok7 features in my application. it’s possible ??
Please explain the file structure.
I really like your blog.. very nice colors & theme. Did you create this website yourself or did you hire someone to do it for you? Plz answer back as I’m looking to construct my own blog and would like to find out where u got this from. thanks a lot
The base theme I use is Divi from Elegant Themes. It’s a premium Theme. Then I have customized it for this blog.
Hello alapan,
i’m useing the commend but i watch an error. i’m using windows10 pro. can you help me for solve it.
full commend is below:
Microsoft Windows [Version 10.0.17134.885]
(c) 2018 Microsoft Corporation. All rights reserved.
C:\Users\MD Ataur Rahman>npm install -g cordova
updated 1 package in 31.614s
C:\Users\MD Ataur Rahman>cd\
C:\>e:
E:\>cordova create MyApp com.app.mathseasy MathsEasy
Creating a new cordova project.
E:\>cd MyApp
E:\MyApp>cd www
E:\MyApp\www>http-serve
Starting up http-serve for ./
Available on:
http://192.168.0.107:8080
http://127.0.0.1:8080
Hit CTRL-C to stop the server
error show:
[Sun Jul 28 2019 11:33:43 GMT+0600 (Bangladesh Standard Time)] “GET /” “Mozilla/5.0 (Windows NT 10.0; WOW64; rv:52.0) Gecko/20100101 Firefox/52.0”
[Sun Jul 28 2019 11:33:47 GMT+0600 (Bangladesh Standard Time)] “GET /” “Mozilla/5.0 (Windows NT 10.0; WOW64; rv:52.0) Gecko/20100101 Firefox/52.0”
[Sun Jul 28 2019 11:33:52 GMT+0600 (Bangladesh Standard Time)] “GET /” “Mozilla/5.0 (Windows NT 10.0; WOW64; rv:52.0) Gecko/20100101 Firefox/52.0”
Your server is running on 92.168.0.107:8080. Can you open this on any browser and check?
ok, Thanks